Grown From Seed: Don’t Settle For Garden-Variety Plants

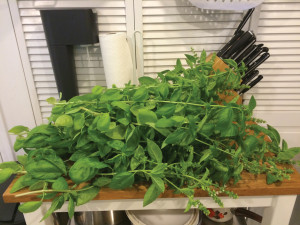
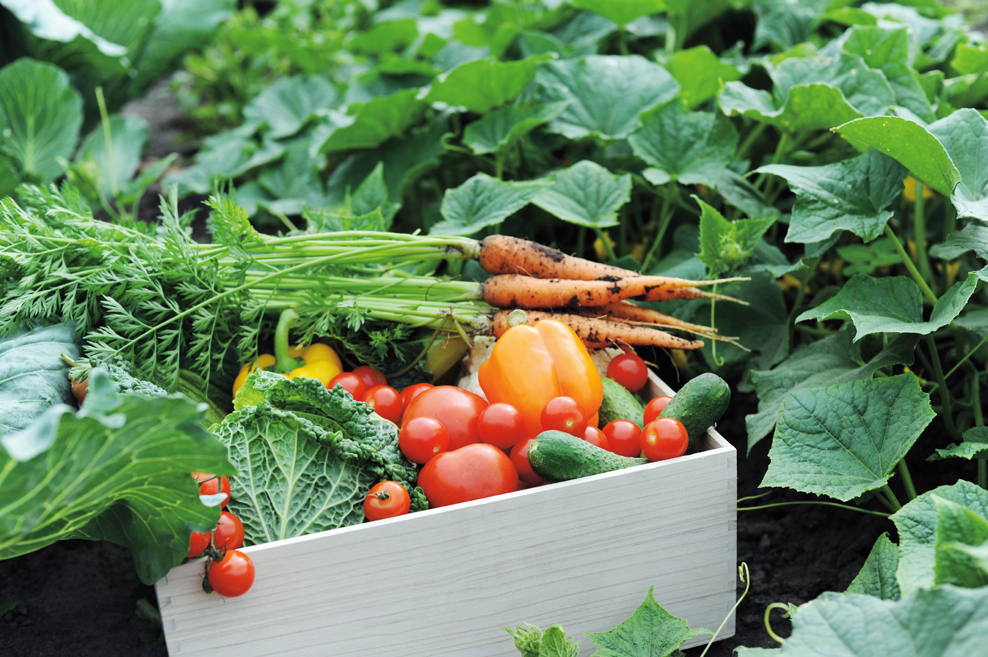 Imagine it’s late July. You are hosting a dinner party. Your guests enjoy a colorful salad of red, yellow and orange heirloom tomatoes, grilled chicken smothered in a fresh tri-basil pesto, and roasted home-grown Japanese eggplant, garnished with a unique variety of flavorful parsley.
The promise of moments like these inspires gardeners to begin plotting during the chilly winter months. They know certain heirloom vegetables and beyond-the-basic basils might not be available at their local supermarket or farmer’s market, and that hunting them down in specialty stores will be costly.
If you want to ensure an imaginative selection of delicious vegetables and herbs for your garden this summer, and maybe learn something new while you’re at it, simply up your garden game a little and start your own plants from seeds. Don’t be daunted! Seed starting is easy, inexpensive and fun. In fact, you can even seek the help of a seed coating materials industry for it be a lot more easier for you.
Why Start from Seed?
 First and foremost, starting from seed lets you select from the widest choice of varieties. Brick-and-mortar garden stores tend to stock basic seedlings, and while catalogues and websites can offer a broader range of plants via mail delivery, choices are still limited.
Another benefit is cost. Even the most exotic seeds are only a few dollars a packet, allowing you to grow multiple plants, each of which would cost significantly more via mail order, especially when you factor in shipping costs.
Many gardeners turn to seed starting simply because it’s fun. While winter winds blow outside, stir-crazy gardeners have an excuse to visit their favorite garden store and peruse racks of colorful seed packets. Itchy green thumbs can get started gardening indoors months before spring, biding their time until they can really get outside and play in the dirt.
Seed starting is also a wonderful way to inspire future gardeners. If you involve children in the process, they not only have fun learning, they can also enjoy picking and eating foods they grew from scratch.
Getting Started
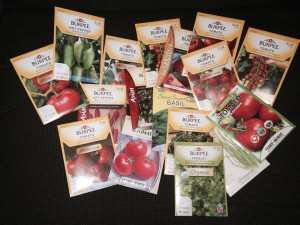
Begin your seed starting at local gardening stores—usually the easiest and least expensive option to acquire your assortment. While local garden shops may have a limited selection of plants in April, they are likely to have a wider variety of seeds in February and March. Give yourself some time to really enjoy perusing the packets, checking out all the varieties available, and mixing and matching to create your ideal future garden.
 You should also ask the salespeople for ideas and recommendations. Many times they are just as passionate about gardening as their customers, especially at smaller neighborhood stores, so be sure to engage them in conversation and take advantage of their knowledge. (Of course, if you’ve read about a certain variety and you can’t find it in stores, you can always go online to find it.)
Often everything you need to know about growing a given plant from seed is right on the packet—including a suggested timeframe for when to start seeds indoors, how long they will take to germinate, and even how long you can expect to wait from transplant outside to harvest. And just like the plastic information tags that come with purchased plants, seed packets should tell you how far apart to plant seedlings, what kind of sunlight is required, and more.
Following the start dates listed on the packet will help your seed-starting project go more smoothly. Seeds started too early may grow spindly and require an interim transplant to larger containers—not a huge hurdle, but if you can time it right, you can avoid that extra step. On the flip side, seeds started too late might be too small to set out by your frost date, which, for very eager gardeners, means wasting precious growing time while seedlings mature.
Packets should tell you clearly when to start seeds indoors. For example, some varieties of Thai peppers take about eight weeks to grow from seed to seedling, while tomato plants may be ready in six weeks, and basil as early as four weeks. Try to stagger seed starting so that all your seedlings are ready for planting at the same time.
Planting time will be governed by the anticipated last frost date of the season, a date determined by historic weather patterns for your zone. Some seed packets feature little maps that clearly tell you when to plant for your area. Our area falls into Zone 7a, where the last frost date usually falls between April 15 and April 30. Mark your calendars to plant your seedlings in that timeframe, then work backward from that when starting your seeds.
 How Your Seedlings Grow
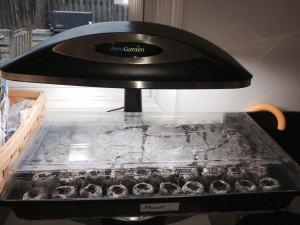
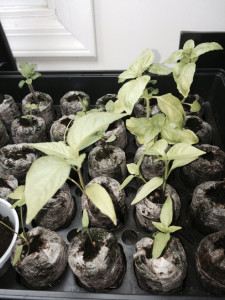
It’s easiest to purchase an inexpensive seed-starting kit, which usually includes a plastic tray with a clear lid—like a little greenhouse—and small disks of compressed soil, peat or coir (coconut husk fiber) that you soak in water to hydrate and expand into small, self-contained pouches. Trays and lids can also be cleaned and reused, so they are a simple investment for future seed starting.
You can also use yogurt, applesauce, or diced fruit cups. Just be sure to wash them well and poke holes for drainage. You can fill these with “germinating mix” or “seed-starting mix” that you can buy at your local garden store—special lightweight mediums usually sold in small bags. As a secondary (and economical) option, if you have some lightweight container potting mix still dry in the bag from last season, use that. Just don’t use garden soil, which is too heavy and might harbor disease or pests. Seeds need a clean, light medium that promotes air circulation and allows roots to grow, but with enough heft to hold some (but not too much) moisture.
 Fill your containers with moistened soil, or place the hydrated pouches in their tray, then sprinkle a few seeds of one plant in each. Mix the seeds in so they are lightly covered. Put plastic wrap over the containers or put the lid on your seed-starting tray to keep moisture in.
If you use a tray system, label a front and back, and make a map of what you planted where. If you are using containers, label with a permanent marker.
To promote germination, place in a location that’s warm, but not too hot, such as a sunny window or near a laundry dryer that generates gentle heat. Check periodically on your seeds and refer to the packet to check their germination time. If seeds from a certain plant don’t germinate in the right timeframe, add a few more seeds into the medium and start over.
After seeds germinate, when sprouts are about a half-inch high, they will need at least 14 to 16 hours of direct light, or they may become thin and scrawny. A south-facing window that lets in a lot of sunshine is ideal. Further enhance natural sunlight by covering cardboard with foil and putting it behind the seedlings.
If you don’t have a sun-drenched spot, create a simple growing area by using desk lamps fitted with grow bulbs, which you can purchase at local garden, hardware or home improvement stores. Lights should be about four inches away from the seedlings—near enough to offer direct light, but not too close to scorch leaves. As plants grow, they should be moved to low tables, with the lamps angled down from higher tables. Adjust distance if you see the edges of the leaves curling, an indication that they are being singed.
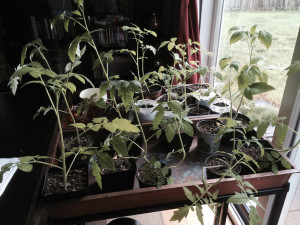 Seedlings will lean toward any light, so rotate them on a regular basis to promote straight growth, and try to keep plants at room temperature, between 60 and 70 degrees. If using grow lights, turn them off at night, since seedlings need a period of darkness each day.
Seedlings should be kept moist, but not drenched. Try to water from the bottom to prevent fungus from killing—or “damping off”—sprouts. Water placed in a seed-starting tray will wick up through the hydrated pouches. Keep containers in a pan with water to be absorbed through the drainage holes. If the growing medium still looks too dry, and seedlings start to wilt, water gently at the base of the seedling.
You will need to “harden off” your seedlings so they acclimate to the outside before you commit them to the garden. About a week before you want to plant, place seedlings outside for a few hours during the day—first in shaded areas, then in sunnier spots. Bring them in at night until the last few days, then leave them out for a few trial evenings.
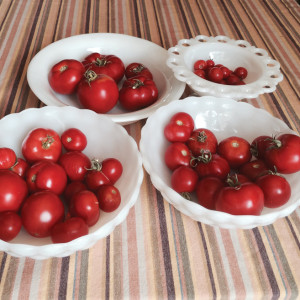
 If these steps seem complicated, they really aren’t. Seed starting is a fun, easy and economical hobby that provides a truly varied harvest. It involves very little effort and money, and the results will amaze you. When spring arrives, you will enjoy a unique sense of pride and accomplishment when you plant seedlings that you’ve nurtured from seed. Then, it’s just a matter of time before you can really savor and share the fruits of your labor.
garden, herbs, seed grown, seed starting, seedlings, seeds, vegtables


Springworks Farm
Love all the details and pics from start to finish! We have some cool aquaponics insights if you want to swap farming growing stories!